Equine Cold treatment plan for Tendon & Ligament Injury
A successful tendon or ligament rehabilitation programme depends on consistency, observation, and flexibility to change as the healing advances. From acute injury through box rest and back to ridden work. An equine cold treament plan is often recommended by your vet. Cryochaps ice boots can provide reliable ice and compression therapy to support healing and give valuable pain relief. Input from your vet for the correct icing plan is crucial and with your vets blessing we have laid out the role of cold treatment for the recovery of tendon and ligament injuries in horses. Knowing when to ice, how often, and at what stage can help reduce inflammation, support tissue healing, and minimise setbacks during rehabilitation.
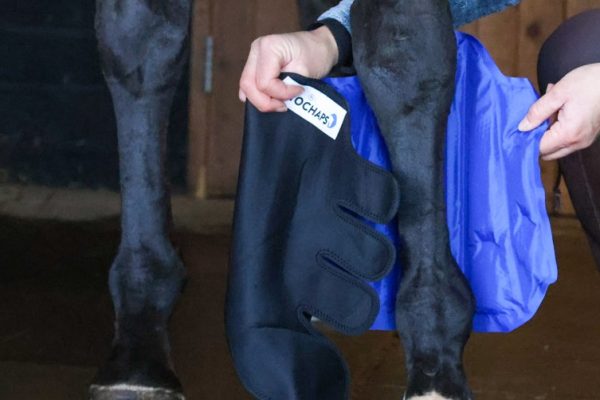
This step-by-step icing plan explains how to use Cryochaps ice boots, with their unique combination of ice and compression, from the moment injury occurs through to ridden work.
Stage 1: Acute Injury Phase (First Days to 2 Weeks)
Typical signs:
- Heat in the leg
- Swelling
- Pain or lameness
- Sensitivity to palpation
Icing Goals
- Control excessive inflammation
- Reduce pain
- Limit secondary tissue damage
- Prevent swelling from worsening
Icing Plan
- Frequency: 2-3 times daily (or as advised by your vet)
- Timing: As soon as possible after injury is identified
- Duration: Short, controlled sessions of 10-15 mins, if heat returns quickly to the leg after 30mins repeat the icing. Icing can be repeated 3x in a session
Using Cryochaps ice boots during this phase provides effective cold therapy, the ice reduces inflammation, swelling and pain while the compression helps limit fluid build-up and supports even cooling around the injured structure.
Key Considerations
- Avoid over-icing, excessive cold can slow circulation too much and damage skin, so do not ice for longer than 15mins, instead repeat after 30 mins if heat has quickly returned to the leg
- Wet the leg before icing
- If finely clipped use a jay cloth between the leg and the Cryochap
- Always check the skin and leg after icing
- Compression when in an equine cold treatment improves cooling efficiency, meaning shorter sessions are effective
Stage 2: Early Box Rest (Inflammation Settling)
As acute swelling and heat begin to reduce, horses are often placed on strict box rest to allow tissue repair.
Typical signs:
- Reduced or absent heat
- Minimal visible swelling
- Horse more comfortable at rest
Icing Goals
- Manage low-grade or internal inflammation, or pain
Icing Plan
- Frequency: Once daily or every other day
- Timing: At a time that works for you
- Duration: Short, controlled sessions of 10-15 mins
Even when the leg looks “normal,” inflammation can still exist within the tendon or ligament, in the initial stages of box rest.
Key Considerations
- Don’t stop icing solely because there is no visible heat, inflammation does not always produce huge amounts of heat
- Cryochaps compression may also help reduce stocking-up associated with box rest
Stage 3: Box Rest With Controlled Exercise (Walking in Hand)
As rehabilitation begins, short periods of controlled movement, usually walking in hand, are introduced under veterinary guidance.
Typical signs:
- No visible swelling at rest
- Leg remains cool before exercise
- Mild post-exercise filling may occur, monitor this closely and speak to your vet it is persists
Icing Goals
- Settle post-exercise inflammation
- Support safe reloading of healing tissue
- Reduce risk of flare-ups
Icing Plan
- Frequency: After each walking session
- Timing: Immediately after exercise
- Duration: Use Cryochaps ice boots to cool and compress the leg for the usual 10-15mins
Even low-grade exercise creates micro-stress within healing tissue. Icing after walking in hand helps manage this response and keeps inflammation under control.
Key Considerations
- Monitor legs closely for any return of heat or swelling
Stage 4: Early Ridden Work (Walk Only)
When ridden exercise begins, often limited to walk, the workload increases again, even if it feels minimal.
Typical signs:
- Leg remains stable at rest
- Occasional mild filling after work, monitor this closely and speak to your vet it is persists
Icing Goals
- Manage cumulative inflammation
- Support tissue adaptation to increasing load
- Maintain consistency during rehabilitation
Icing Plan
- Frequency: After every ridden session
- Timing: Immediately after work
- Duration: Cryochaps ice boots applied to working legs for the standard 10-15mins, if swelling is occurring after exercise you can use Cryochaps more regularly, twice a day for example. Keep in contact with your vet if swelling persists.
Continuing to ice after ridden walk work helps prevent small inflammatory responses from accumulating over time.
Key Considerations
- Walk work still loads tendons and ligaments
Stage 5: Progressive Rehabilitation (Increasing Workload)
As the rehab programme advances, exercise intensity and duration gradually increase.
Icing Goals
- Support recovery from increased strain
- Minimise post-exercise inflammation
- Hopefully protect long-term soundness
Icing Plan
- Frequency: Once there has been an underying injury it may be good practice to use ice and compression as a standard cool down routine after all exercise.
- Timing: Post-exercise
- Duration: For the usual 10-15mins: Cryochaps ice boots can be uses as part of a regular recovery routine after exercise
At this stage, icing becomes both rehabilitative and preventative, helping the horse cope with increasing demands. If any swelling occurs you may want to seek veterinary advice, reduce the workload and increase the icing applications until the swelling subsides.